MLAB MISSION STATEMENT


The Mobile Literacy Arts Bus (MLAB) is an artist-run, renovated recreational vehicle that exists as a flexible space open to community members’ proposals for alternative educational and cultural programming.

MLAB is the collaborative effort of the 2007-2008 Social Sculpture class at Syracuse University, comprised of 10 art and architecture students and lead by artist and Director of Community Initiatives in the Visual Arts of Syracuse University, Marion Wilson. Our mission was to transform a used, 1984 Recreational Vehicle Bus into a Mobile Literacy and Arts Bus for use by the Syracuse City School District and the greater Syracuse Community. MLAB serves as a physical manifestation of Syracuse University’s Scholarship in Action initiative, by pairing University resources with community needs in an attempt to address the staggering drop out rates in the Syracuse City School District High Schools. Through the School of Education at Syracuse University, incredible curricula that bridge photography, poetry and literacy currently exist within the public schools-- however due to a crisis of space, the schools don't always have the space or resources to house it. MLAB is this space. The bus serves as a mobile classroom, digital photo lab, gallery space, and community center. As a team, we did it all: demolition, design, and construction.

MLAB is made possible from the generous support of the School of Education at Syracuse University and Entitiative.


Thursday, February 28, 2008

Ceiling!!!

Sorry I wont be in class today. Next week we will be able to look at a layout for the website.
At the moment the ceiling tiles are almost worked out. Just need a couple dimensions from the bus before we can start cutting. Below is a series of attempts to get the most surface area out of the panels. The last is the most recent.So close...

Thursday, February 21, 2008

Ceiling

The sub-ceiling (or super-ceiling) is 90% complete. The picture below shows only the panels in the center of bus. The sides are down at the moment for wiring.

Having the entire ceiling faced with ply will make arraying and dilling up the acrylic a quick and clean install. The Yun-Pei and Marion custom sanded panels are gorgeous. We were able to get a huge discount on scrap acrylics from Laird Plastics up by Carrier Circle. Only a day or two of work drawing, laser cutting and cleaning left to do before they go up.

Fabric

Continuing the theme of material reuse and buying as local as possible....

We found Scott over on State Fair Blvd to consult on and supply our textile needs.

Sunday, February 17, 2008

Hey guys! With assistance from one of our volunteers yesterday I was able to wire together all of the light sockets! This is huge progress in terms of lighting because what I had figured to be a 5 hour job only required 3 hours with an extra set of hands! The only things left to do in the back of the bus are
1-use zip ties to secure wires that hang below the depth of the ceiling to the structure of the ceiling (anyone can do this and I know I had purchased some of these somewhere along the way for use in the bus)...
2- run a ground wire from the 2 end light bulbs on the loop back to the
front of the bus (the copper wires that are not attached to the light socket are the
ground wires, we just need to use wire nuts to connect those to two lengths of wire and then run it to the front of the bus)
3- maybe move the wire that runs to the heater in the back through the holes
in the ceiling structure so that gets out of the way of the panels being placed up
there...
4- and finish wiring to the box in the front of the RV (I'm not sure of the
status David left this in, so maybe someone could contact him about that in addition to
the email I sent today)... That should be it for now. It's all coming together bit by bit for our April 3rd unveiling!

Wednesday, February 13, 2008

February 14 Class meeting

Thursday February 14, 2008
MLAB meeting

8:30 am
Team meeting
Update on ceiling/Plexiglas
Update on wood/furniture
Update on cushions
Review larger schedule and goals for remaining six weeks and this schedule for this weekend
Review Unveiling scheduled for April 3rd at 8:30 am tentatively at Nottingham H. S.
Plug inVolunteer help

9:30
Steve Sartori photographs floor of bus

10am – 12:30pm
Yun Pei and Vince to the Warehouse to work on ceiling
Marion and Jessica- create aggregate wood door/organize wood and set up clamping system
Zach – woodshop/ begin work on furniture

Monday, February 11, 2008

updates

Fantastic work Jessica. What I am realizing about this collaborative designing is that if we have one lead on the task, in consultation with the group, we set up an assembly line process so that others can chip in and help. So while you are waiting for the samples, let's imagine how you can lead the cushion team. I guess factories developed assembly lines for a reason.

Vince, Yun Pei and I bought the scraps of plastic from Laird Plastic today. Wednesday morning will be pick up and delivery to the Warehouse of the plastic where it will be laid out in the ceiling shape and the light fixture holes cut. We were only able to buy two different saturations of white (that is all they stock even in full sheets) - but we were able to get varying thickness and each of the scraps is a different size ranging from 4'xalmost 8" to 1'x2'.

We are waiting for a report on the electric work of this past weekend.
All hands on deck for Thursday's class.
Tim Rollins of Tim Rollins and KOS (go on line to look him up)
is having a tour of the RV tomorrow at 11:30 followed by lunch. Jessica and I will be there. All other mlabbers are invited - just let me know.
Marion

Cushions: Seeing Red


Over the past two weeks, there has been some major cushion 
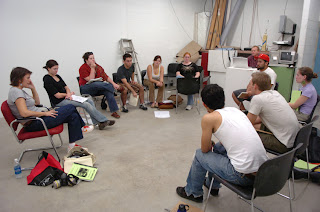
conversations going on. Among them include a tutorial by Stephanie Liner, resident upholstery expert, in making piping, making cushions, the materials to order, and multiple discussions on how it is we're going ot do what we want to do.

That said, I've made a handy list of most of the materials we're going to need, like foam, batting, and welting. Searched around a bit and looks like I've found some good deals.

Now here's the real fun stuff, THE FABRIC. After discussions with Marion and other team members, we've come upon the consensus that the color should be red, with a nod to the retro diner (inspired my marion's chair pictured in previous photos) with white piping. The idea is that this can be reversed out at moments. This will add some color and softness while still in the same langage as the rest of the RV.

So I went on the hunt for good quality, attractive, upholstery vinyl... and have come upon Naugahyde, which is the industry standard when it comes to this stuff. The vinyl is -20 degree cold crack, fire retardant, passes all sorts of california codes, is used in cars, boats, restaurants, and lots of places that see lots of tushes. It is also highly cleanable. It is a little pricy, but I've sent out emails to various dealers for samples, and quotes, and have asked around for special consideration with pricing for our good cause. Some incredibly generous dealers have already gotten back with me, and said that they'd love to work with us-- and that once we choose what we want from the samples, they'll see what they can do for us. Still waiting on other responses, like from the manufacturer directly, as well as various other feelers sent out on other e-commerce sites.

So that's pretty exciting.

Now we're just waiting for the samples to get here, and a few mock ups , and from there it should be pretty smooth sailing and should move very quickly-- especially with all of the wonderful help we've enlisted!

Above are just a few samples of what the colors I'm waiting to get the samples of.

My personal favorite is the Zodiac Burgundy (Actually Red), seen in the chair, it's totally retro chic.

Thursday, February 7, 2008

light [at the end of the tunnel]


Lighting update: after a couple of impromptu meetings this week, here is the quick run-thro of what has been decided . . .

1) the light switch will be located in the cabinet.

2) there will be NO cove/ambient/atmospheric lighting from the walls. This means none of the light fixtures will be located in the 6” recess above the wall panels. I know this was our initial design response. We even designed the wall panels with this lighting in mind. However, we did some testing and result has been unsatisfactory. A couple of the problems we ran into included but were not limited to . . . the fixture didn’t fit in the space provided, not enough light was given off, risk of breaking bulbs, difficulty of installing, or made the bus look like a fishbowl.

3) INSTEAD, all the lighting will be mounted from the ceiling. Keeping with the look of the “raw” exposed bulbs of the work lights now in the bus, we’ve decided to mount standard sockets to the ceiling and place shallow 40 watt bulbs in random clusters across the plane of the ceiling.

4) When finished, the ceiling will become a playful arrangement of point lights. Wherever a standard socket is installed, a 2” diameter hole will be drilled in the matching plexi ceiling panel. This will allow the bulb to drop about ¾” below the ceiling plane. (reducing risk of heat, adding depth and dimension to the ceiling). I’ve posted a few images to help explain.

5) The advantages . . . more and better light, easy installation, easily customized by client.

6) Areas for further design . . . dimmer switch? Create two or more sets of lights? (ex: both sets turned on for classes, one set can be turned off for digital presentations, other set turned on for gallery shows)

here is a quick run through of the next few steps . . .

1) Figure out “exactly” how the standard sockets will attached to the ceilings. No one has really talked about this yet. I have a couple ideas. More would be a help.


2) Recieve drawing of ceiling panel layout from Vince and Yun.

3) Purchase all the bulbs, sockets, wires, etc. we need to start working. I’m planning on stopping by Ed Joy Friday to pick up fifteen 40 watt bulbs and fifteen 40 standard sockets. (and to return the florescent t5 bulbs) Still need to purchase wires, etc. David, do you know what else we need? Are you planning on buying some of it?

4) 9 am Saturday. Get started on installation and purchase what else we might need for lighting. Nicollette, David and I will be at the bus at 9 am on Saturday.


That’s it for now. Big thanks for everyone’s help.

the floor

The floor is almost entirely in the bus now and we are looking at lighting designs and ceiling this week. Peek in and have a look - its beautiful.
Also notice the red vapor barrier - that will be the color of the cushions.
If you want to help please contact:
Jessica for uphosterying;
Yun Pei for ceiling;
Julia and Nicolette for lighting and electrical and
Zach or Marion for general inquiries and wood related issues.
We still need more laminating and collection of wood for the door and the wheel wells. Does anyone have anymore leads on scrap wood or miss gluing and clamping? NO joke.
We are working towards an April 3rd unveiling.

Tuesday, February 5, 2008

Sunday, February 3, 2008

update weekly schedule

Monday: Marion and Yun Pei shop for plastic for ceiling and review design ideas
Tuesday: 8:30-noon - mlab team installs finished floor into bus!!!!!!!!!!!!
Wednesday: 10 - lighting team meets at Comart
Thursday: 8:30 am- class meets

Saturday, February 2, 2008

More floor stuff...

Team M-Lab applied two coats of finish to the floor today - it's looking great! Coat #3 goes on tomorrow and the floor should be completely installed by Tuesday afternoon. Here's a shot of Yun Pei admiring our handiwork.